

What is the best way to disassemble a wire shelving unit?
If you need to relocate your shelving unit or remove a shelf, life is easier if you know how to disassemble it properly.
If you are looking for directions to assemble your chrome wire shelving unit, these are all over the internet.
Yet, we found it interesting how many companies do not tell you how to disassemble your wire shelves properly.
After all, when done correctly, it’s a huge benefit to our chrome wire shelving systems. Therefore, in just a few simple steps, we will have your wire shelving system disassembled in minutes.
Please Note: For the most part it is pretty easy and straightforward, just like assembly. However, we do have some pointers that might make your life easier if you are planning on moving the unit into a different location or need to remove a shelf. The tapered split sleeves (plastic shelf clips) that snap around the post create a positive lock that becomes stronger as the load increases. Simply stated, the more weight on each shelf the more difficult the dis-assembly. Make sure to empty your shelf prior to disassembling!
We recommend the following tools to assist you in this simple process:
- Rubber mallet or hammer
- Cloth or towel (to protect the truss support on the underside of the shelf)
- Small screwdriver (optional)
Let’s Get Started!
 How to Disassemble a Wire Shelving Unit
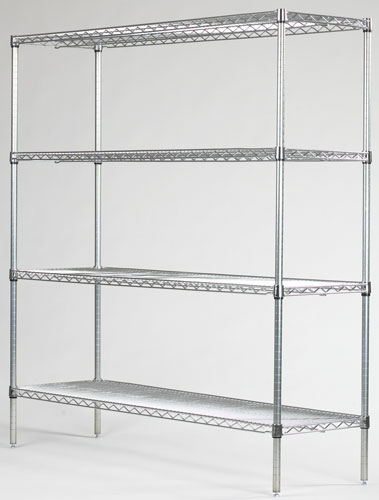
1) Start with your the top shelf. This may seem obvious, but we figured we would let you know anyway.
2) Using your mallet, tap up evenly in each corner. Come from underneath each individual shelf and tap up evenly in each corner with preferably a rubber mallet or something that will not damage your shelving unit. If you do not have a rubber mallet available, you can use a hammer and place a towel or cloth at the striking point. This will prevent you from causing any damage to the supporting truss underneath the shelf. Again, the trick is to tap evenly around the shelf collars. Once each corner of the shelf is loose evenly lift the shelf up and over the posts. If you have a big shelf like our jumbo 24×72 units then it is a lot easier if you have 2 people simply because the shelves might be bigger than you.
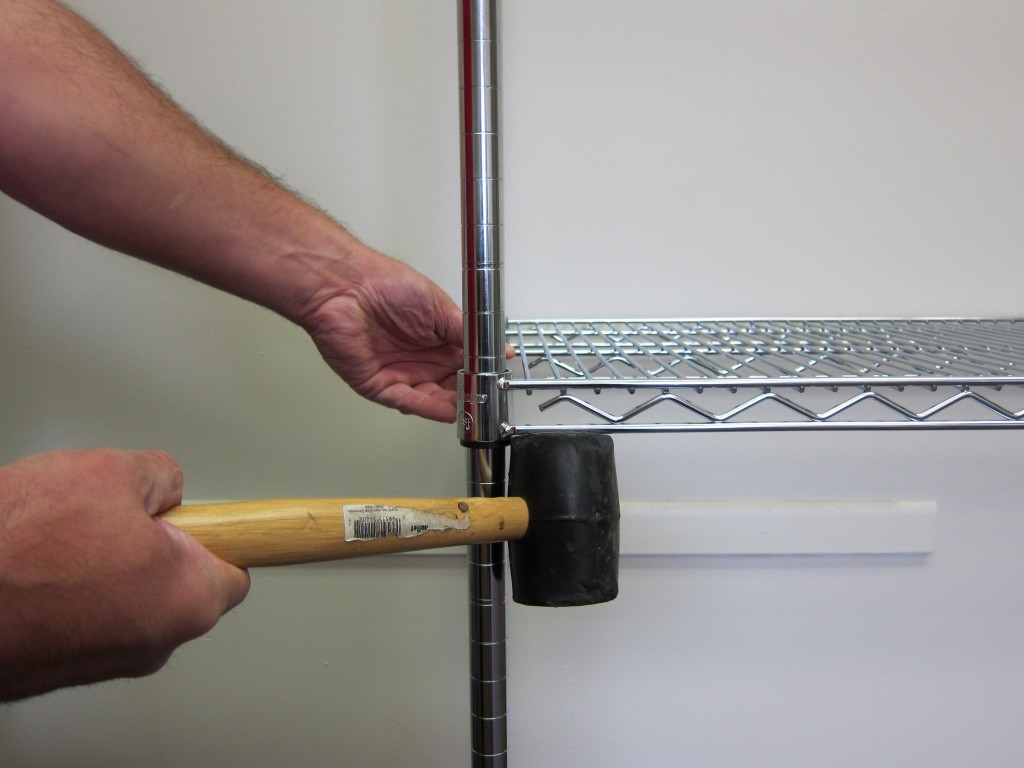
Gently tap under side of the shelf near the post collars to disengage the positive pressure lock.
3) Separate the shelf clips from the post. Be sure to hold on to these clips and place them in a safe place because you will need them again to reassemble. If you lose them or need to buy additional clips, click here.
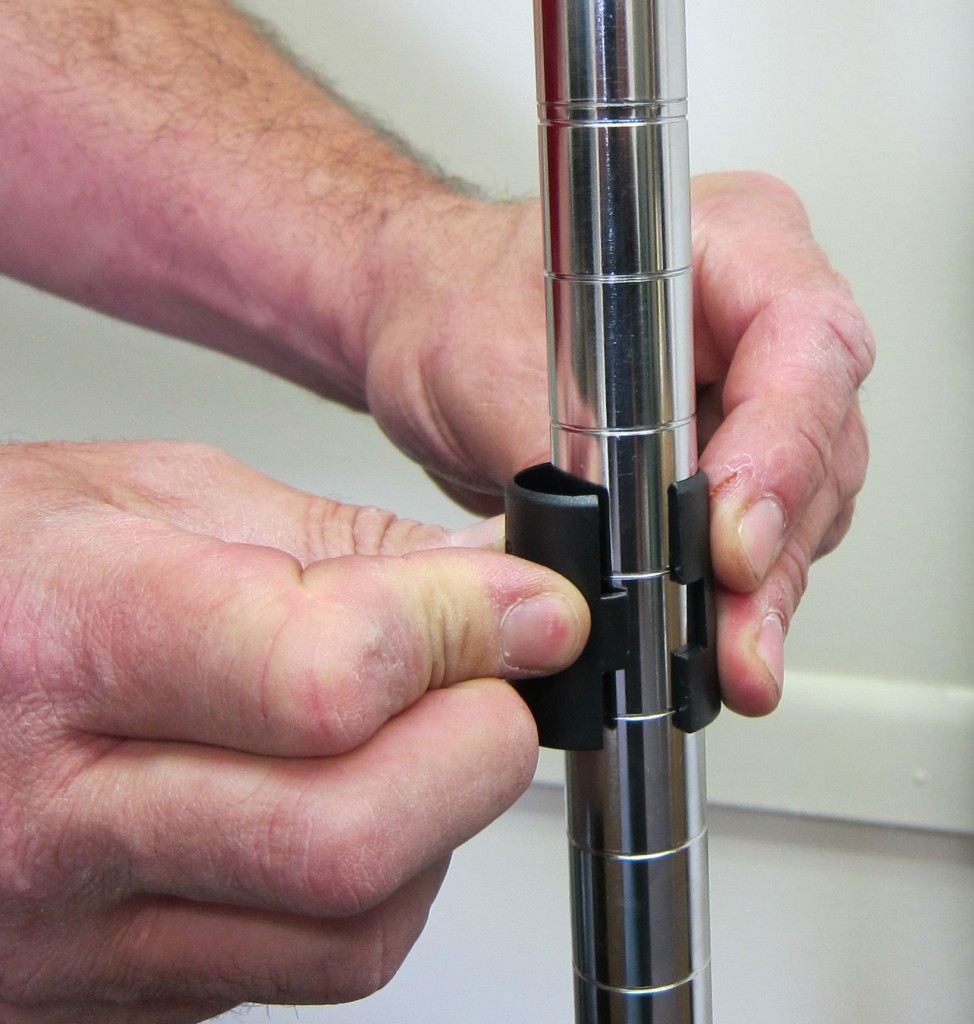
Removing the shelf clips may be difficult. Simply use a small screwdriver to separate the two halves.
4) Repeat steps 2 & 3 for each individual shelf being disassembled.
5) Gather your poles and any accessories and put them in a safe place. You might have and be sure not to lose anything. Using a plastic bag is an easy way to store the clips until you reassemble.
6) Your wire shelving unit is now fully disassembled. Sit down and pour yourself a sophisticated espresso with all of your extra time; because you are awesome.
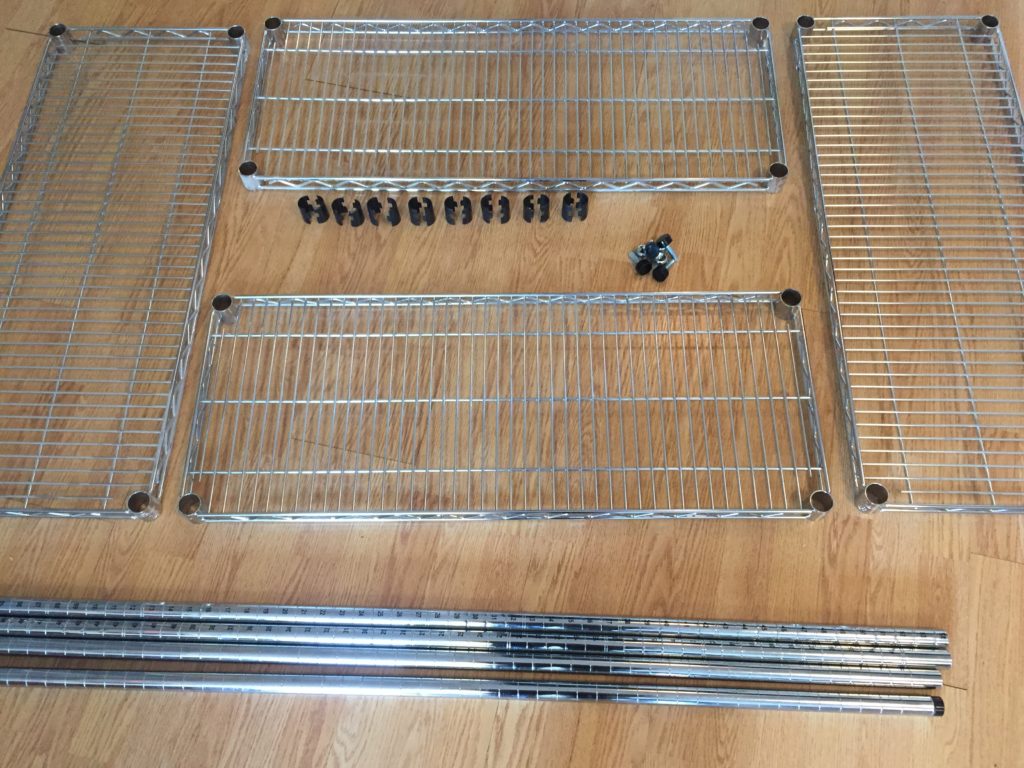
Ta-Da! Shelving Unit Disassembled
Wasn’t that as easy as putting them together? We realize this may be a simple process, but we often receive questions regarding how to properly disassemble a wire shelving system. If you have any questions or are still having trouble removing your shelves or disassembling your Omega shelving unit, please call us at 1.800.221.8665, we would be more than happy to assist you.
And for answers to our other frequently asked questions, head on over to the Expert Q and A section of our blog.